Guide · 7 min read
How to use POS mode: sell at the counter from your phone
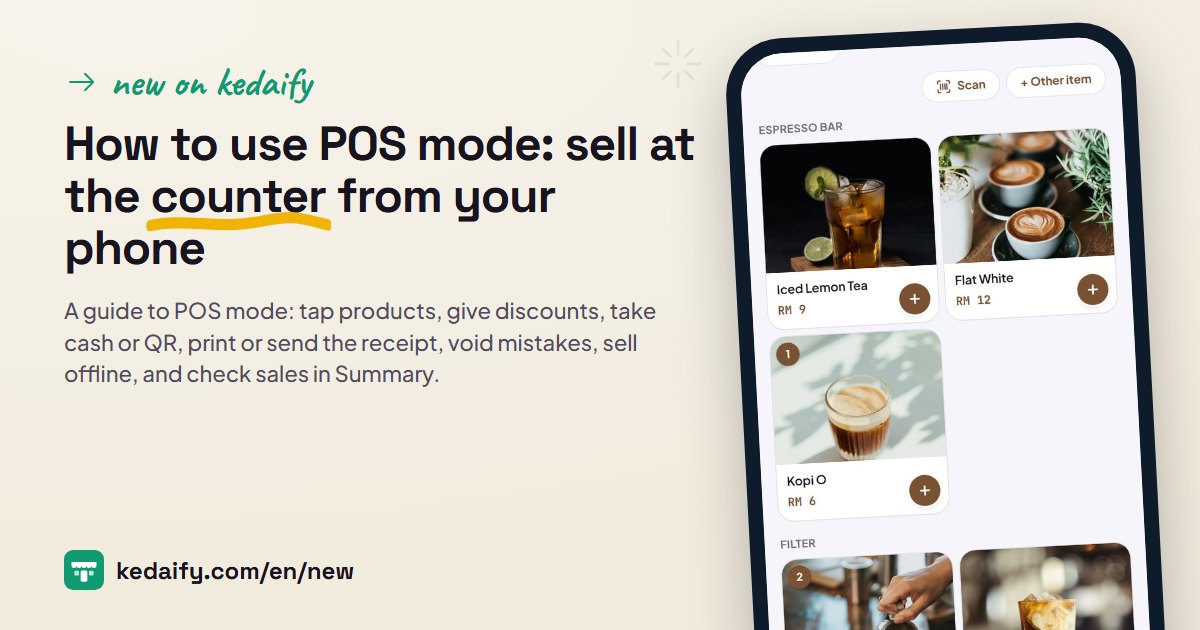
POS mode turns your phone, tablet or computer into a cash register for buyers who come in person. The products are the same as your online store, and every counter sale is recorded in the same place as online orders. Here are the steps, from setting up products to checking your sales at the end of the day.
1. Set up your products and QR payment code
POS uses the same products as your store: whatever you set in the Menu tab shows in POS at once, with photos, promo prices and options. Want to take QR payments at the counter? Add your store's QR payment code first in Settings → How to order & pay. Without it, POS takes cash only.
- A product marked Sold out can't be tapped in POS.
- A product whose stock you track shows the stock left in POS.
- Stores with a big catalogue get a search box at the top of POS.
How to use it: Dashboard → Menu, then Settings → How to order & pay.
2. Tap the products being bought
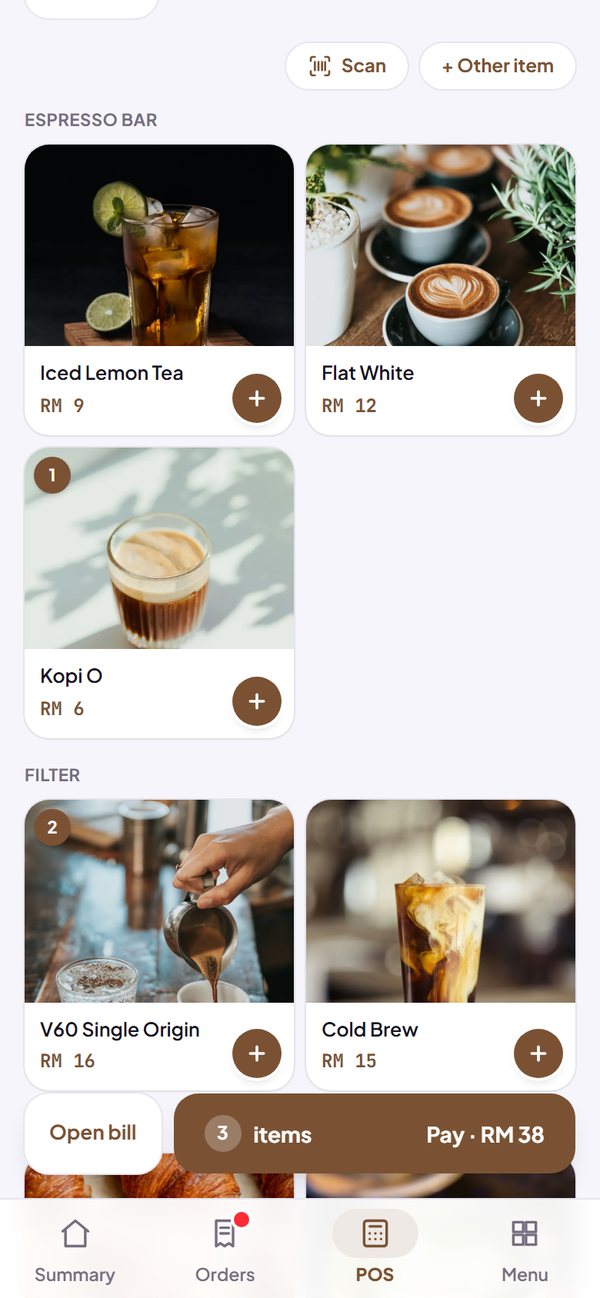
Open the POS tab, then tap the products the buyer wants. Each tap adds one, and the count shows in the corner of the photo. At the bottom of the screen a Pay button appears with the number of items and the total.
- Tapped by mistake? You can still lower the count on the payment sheet.
- Something that isn't in the catalogue, such as a bundle or an item left with you? Tap + Other item, then enter a name and price.
- Stock shows 0 but the item is in your hand? POS asks first, then lets you sell it; the stock is marked to recount in the Menu tab.
How to use it: Dashboard → POS.
3. Products with options
Coffee with a sugar level, a shirt with a size: tap the product, choose on the sheet that appears, then tap Add. Required options are already chosen for you, and any extra price (for example size XL) is included.
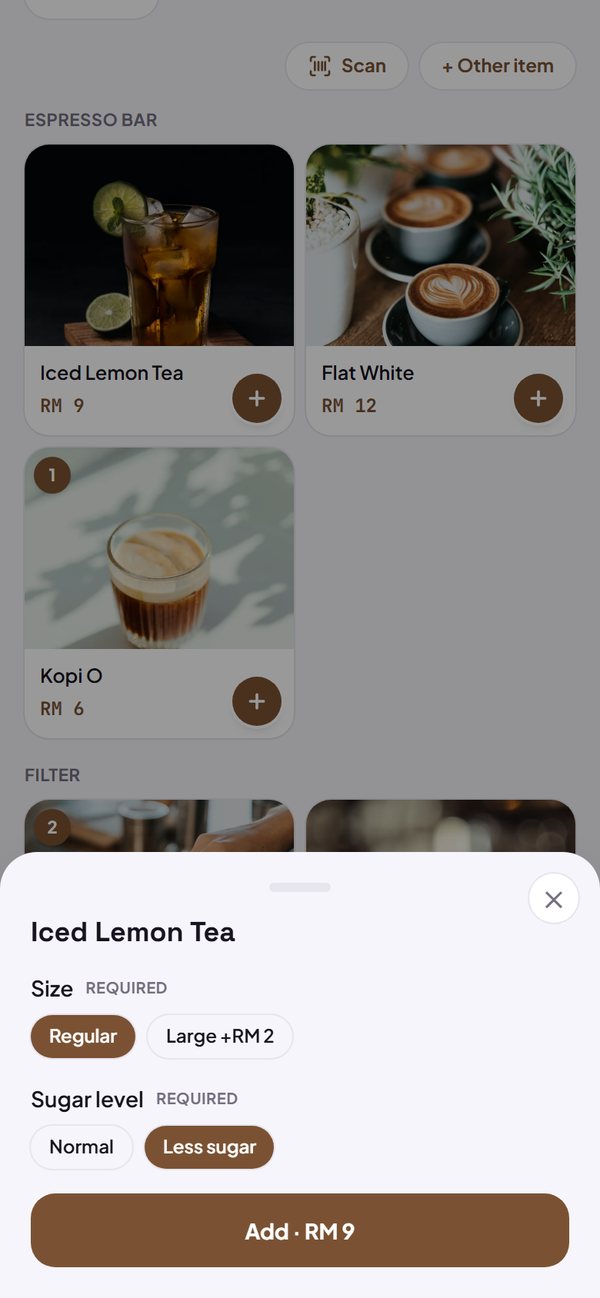
- The options chosen are written on the receipt, for example Less sugar.
How to use it: POS → tap the product → choose → Add.
4. Discounts, store promos and notes
On the payment sheet, tap + Item discount to cut the price of one product, as an amount or a percentage. For the whole order, open Discounts & promos: pick one of your store's promos or vouchers, or enter your own discount with a reason. Below that, add the buyer's name, dine in or takeaway, the table number, and a note if needed.
- The discount, name, table and note are written on the receipt and in Orders.
- Store promos aren't applied in POS by themselves; the person at the till chooses them.
How to use it: POS → Pay → Discounts & promos.
5. Pay with cash: change is worked out for you
Tap Pay. On the payment sheet you can still change the count of each product with − and +. Pick Cash, then enter the money received, or tap a quick button such as Exact amount. The change shows right away. Once you have the money, tap Done · received.
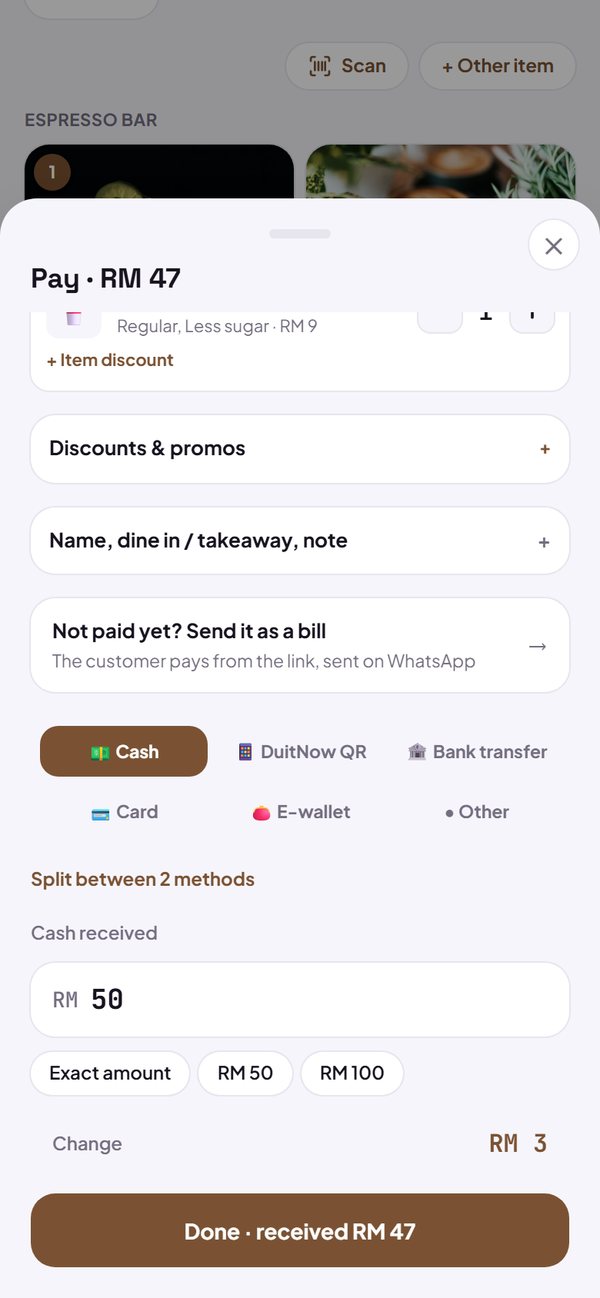
- If the money is not enough, the Done button can't be tapped yet.
- Paid by Transfer, Card or E-wallet? Pick the method, check the money has arrived, then tap Paid.
- Part cash and the rest by another method? Tap Split between 2 methods, enter the first part, then pick the method for the rest.
How to use it: POS → Pay → Cash.
6. Pay with a QR code
Pick QR, then show the screen to the buyer. Your store's QR payment code is a fixed image, so the buyer may need to type the amount themselves: tell them the total, which is also written under the code. Once the payment has arrived, tap Customer has paid.
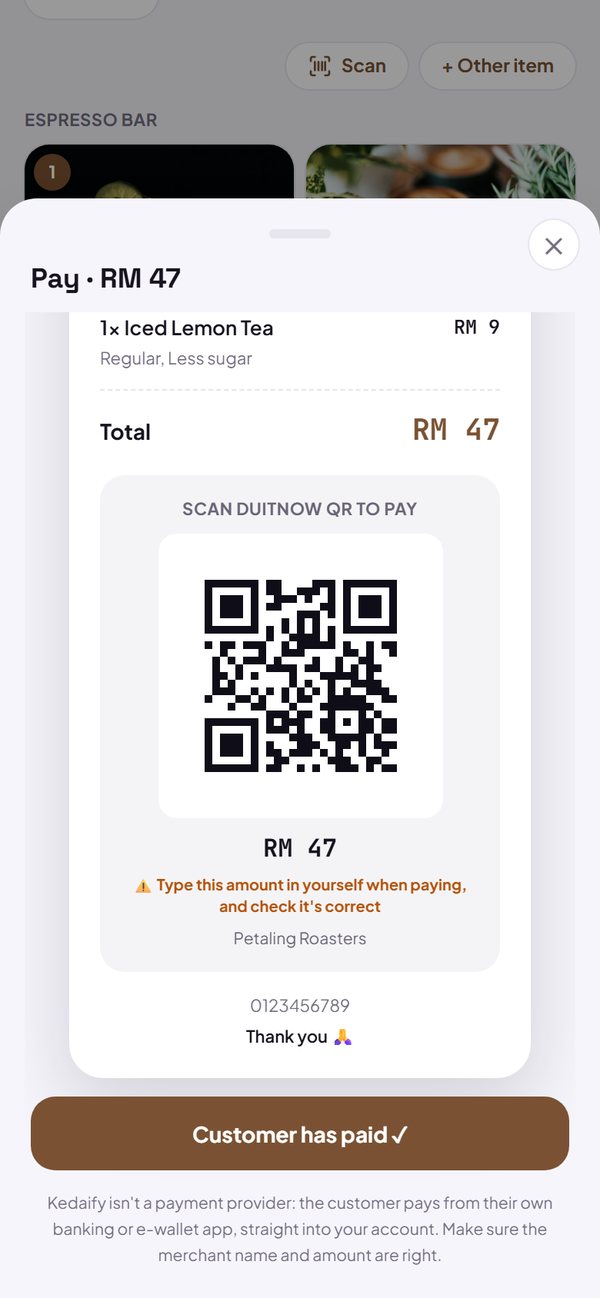
- Check the notification or the transaction list in your bank or e-wallet app before tapping Customer has paid, because a fixed QR payment isn't confirmed automatically.
- The money goes straight into your own account, not through Kedaify.
How to use it: POS → Pay → QR.
7. Print or send the receipt
Once the sale is saved, its receipt shows right away. Tap Print receipt for a Bluetooth thermal printer, or Save / share receipt to send it as an image, for example to the buyer on WhatsApp. Then tap New sale for the next buyer.
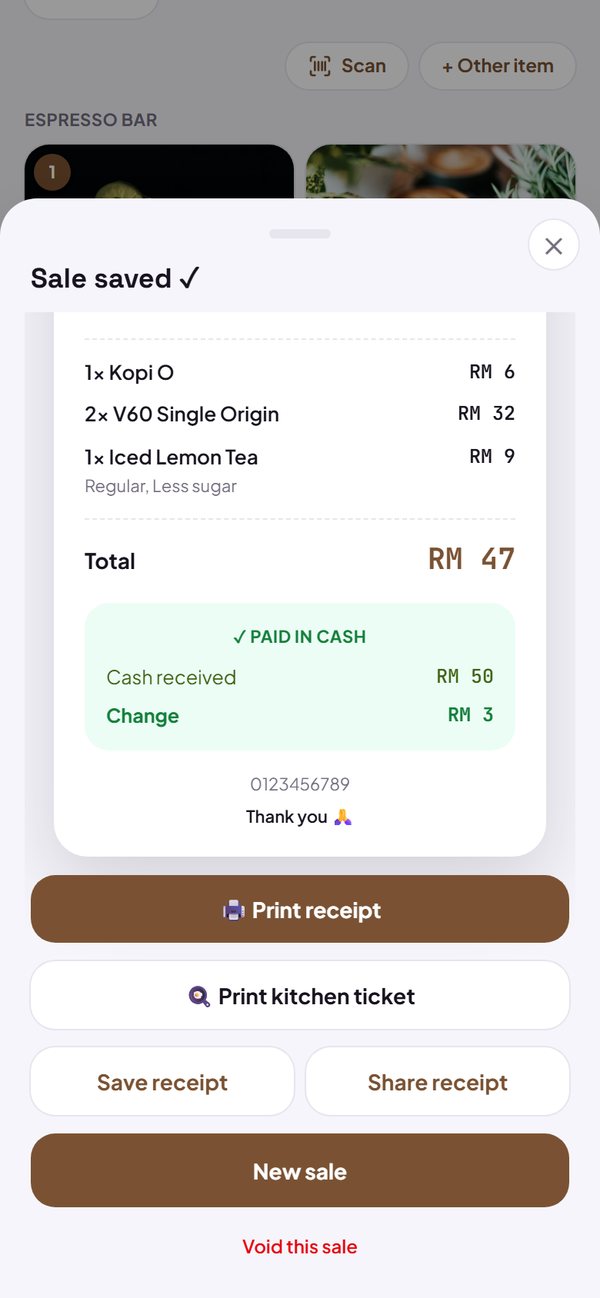
- A Bluetooth (BLE) thermal printer that uses ESC/POS commands, from Chrome or Edge on Android or a computer.
- The first time you print, pick the printer from the device list; while the page stays open, later prints go straight through.
- On an iPhone (Safari) the Print receipt button doesn't show; the receipt can still be sent as an image.
How to use it: Done → Print receipt or Save / share receipt.
8. Void a wrong sale
Entered something wrong or the buyer changed their mind? On the receipt, tap Void this sale. For an earlier sale, open Orders → Done and tap Void. Pick a reason, for example Entered by mistake. The sale comes out of your sales, the stock goes back, and it stays recorded under Orders → Cancelled with its reason.
- A sale voided while still offline is never added to the records.
- A sale older than 24 hours can only be voided by the store owner signed in with their own account.
How to use it: Receipt → Void this sale, or Orders → Done → Void.
9. No signal? Keep selling
POS sales are saved on your phone first, so if the internet drops while POS is open, you can still finish the sale and the receipt still shows. Until they're sent, a reminder about sales saved offline shows above POS. As soon as you're online again, the sales are sent by themselves.
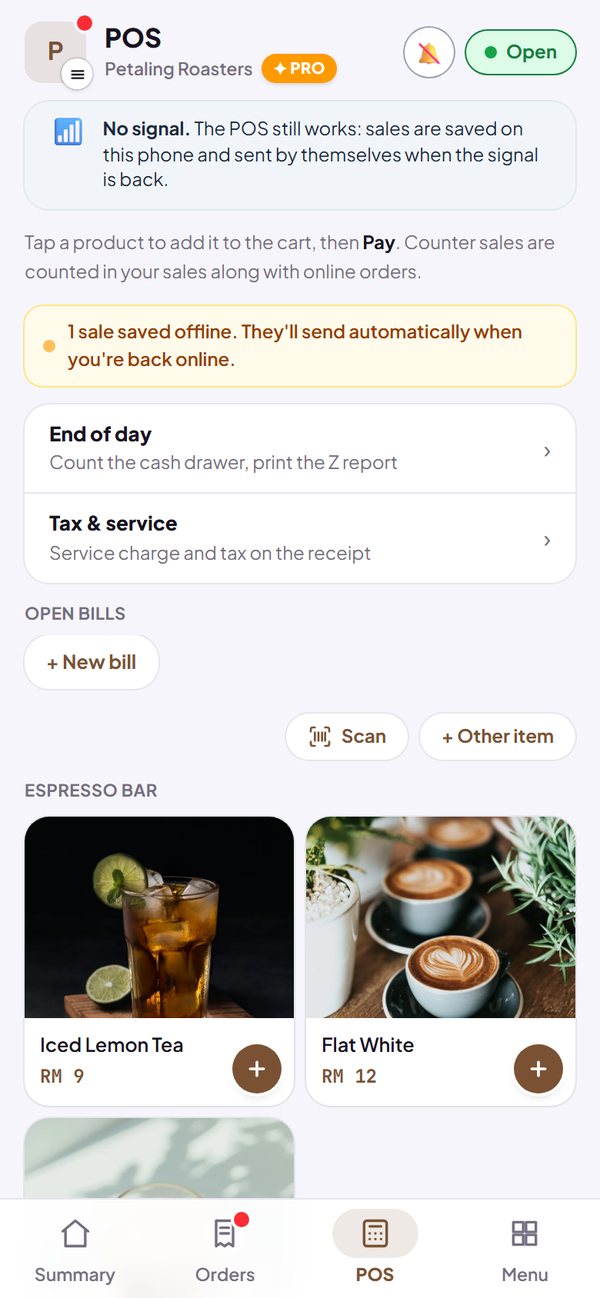
- Don't clear the browser data or switch phones until the reminder is gone, because unsent sales are still on that phone.
- A sale is never recorded twice, even if it is sent again.
How to use it: Automatic in the POS tab.
10. Check the sale in Orders
Every POS sale is recorded as Paid and Done in the Orders tab, marked POS, with the products and total. Stock of the products you track goes down at once too.
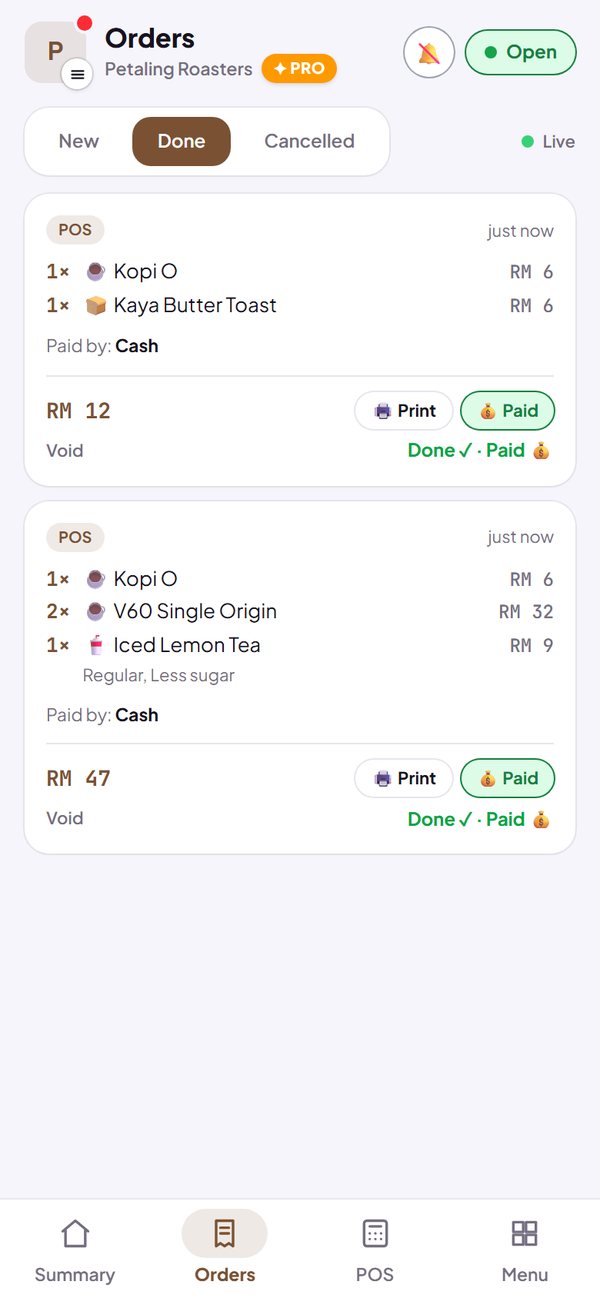
- Open Orders → Done to see today's POS sales.
How to use it: Dashboard → Orders → Done.
11. The recap in Summary
At the end of the day, open Summary and pick Today. POS sales are counted together with online orders, and under Order channels they show as POS, so you know how much came from the counter and how much from online.
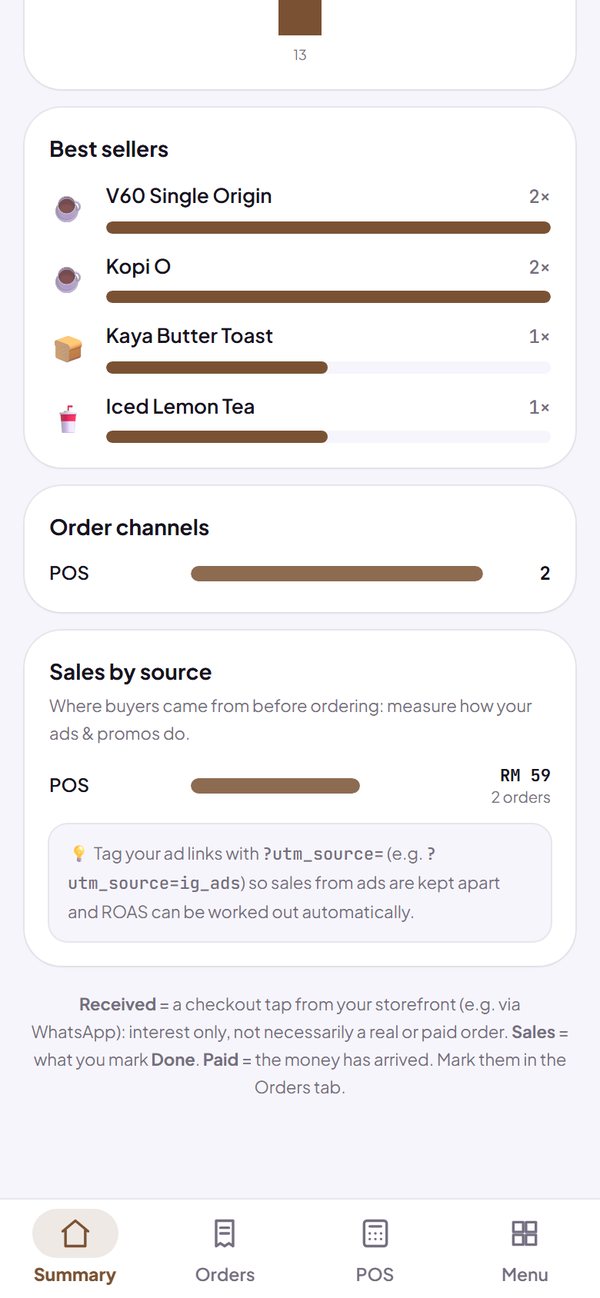
- Best sellers counts counter and online sales together.
How to use it: Dashboard → Summary → Today.
Questions about this guide
Is POS mode free?
Yes. POS, cash, fixed QR payment and other methods, discounts, voiding, stock left, digital receipts, printing to a Bluetooth printer, and saving offline all work on the Free plan.
Can I use it on a phone, tablet or computer?
Yes, in a browser. Open your store's dashboard, then the POS tab. No extra app is needed.
Can a wrong sale be voided?
Yes, from its receipt or from Orders → Done → Void, with a reason. The sales go down and the stock goes back. A sale older than 24 hours can only be voided by the store owner.
Do vouchers and store promos work in POS?
Yes. A product's promo price (the crossed-out price) is applied straight away. Store promos and vouchers are chosen in Pay → Discounts & promos. You can also give your own discount per product or for the whole order.
Is a QR payment confirmed automatically?
No. Your store's QR payment code is fixed, so check the notification or transaction list in your bank or e-wallet app, then tap Customer has paid.
Can several cashiers work at once?
POS can be open on several phones signed in to the same store dashboard; all sales go into the same records. Separate accounts for each cashier, shifts, and a recap per cashier are on the Business plan.